Video and motion are more eye-catching than static, non-moving images. If you only have a static image, you can make it move with Adobe Photoshop and Adobe After Effects. In this post, I will walk through my thought process and steps to create one of these GIFs.
Quick Explanation
For a quick 101, the steps are:
- In Photoshop, mask and cut out moving parts
- Recreate the background that the moving part will reveal
- Bring it into After Effects to use puppet pins to animate the image.
Planning
For the starting image, you can use an image that you already own. Alternatively, as well, I have found free to use images with the following sites:
- Museum Open Access databases such as the one from The Met
- Free stock image sites such as Unsplash or Pexels
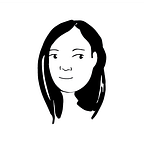
In this post, I am using this image by Rasheed Kemy found on Unsplash:

The reason I chose this image is that the parts I want to create motion around have simple background areas. The hand holding the phone has a consistent color of the shirt along with a predictable poster. The hand holding the grab handle and the head have straight lines and a white-gray consistent color.
With this photo chosen, I can move on to creating a story-plan board, which consists of planning motions and understanding what backgrounds need to be created. Limiting how much of the background needs to be recreated helps speed up the process. In order to limit complex background building, I am considering not moving to the green 2 arrow direction as I will have to recreate the woman in the glasses to the left. I believe it will be more difficult as hair and so many unknowns exist.

Another aspect of motion I am considering is with the entire photo if I want to include either a zoom in/out effect or a slide in/out effect, which will add a more dynamic aspect to the finished product.
Part A: Photoshop
With all the planning done, it’s now time to bring it into photoshop and cut out the images.


Once the images are cut, now it’s time for the background surgery. I advise using Content-Aware Fill, the Clone Stamp Tool, the Spot Healing Brush, and the Smudge tool. The newly created background only needs to include where it would be exposed by the motion of the cutouts. This is always surprisingly less area than I expect.


Part B: After Effects

With all the layers done, it is time to bring it into After Effects. The main effect applied to all three parts is similar. It essentially is utilizing the Puppet Pins and position settings with keyframes. For the Puppet Pins, with each of the cut-out layers place Puppet Pins on the joints, as that is where there are changes in motion. Moving around the timeline, I adjust the position of the Puppet Pins, making sure that the background uncovered is only the newly created updated background. I also change the keyframes to be Easy Ease by 1. selecting the keyframes 2. right-clicking and going to Keyframe Assistant > Easy Ease. For some of the keyframes, I adjust the time graphs for acceleration/deceleration of the motions.
With that we have the finished motion asset:


Other Details
As a caveat, this does take some time, but it is feasible to complete in a day if the goal is simple enough. For example, I started this project at 7:00 PM and now it is 9:40 PM.